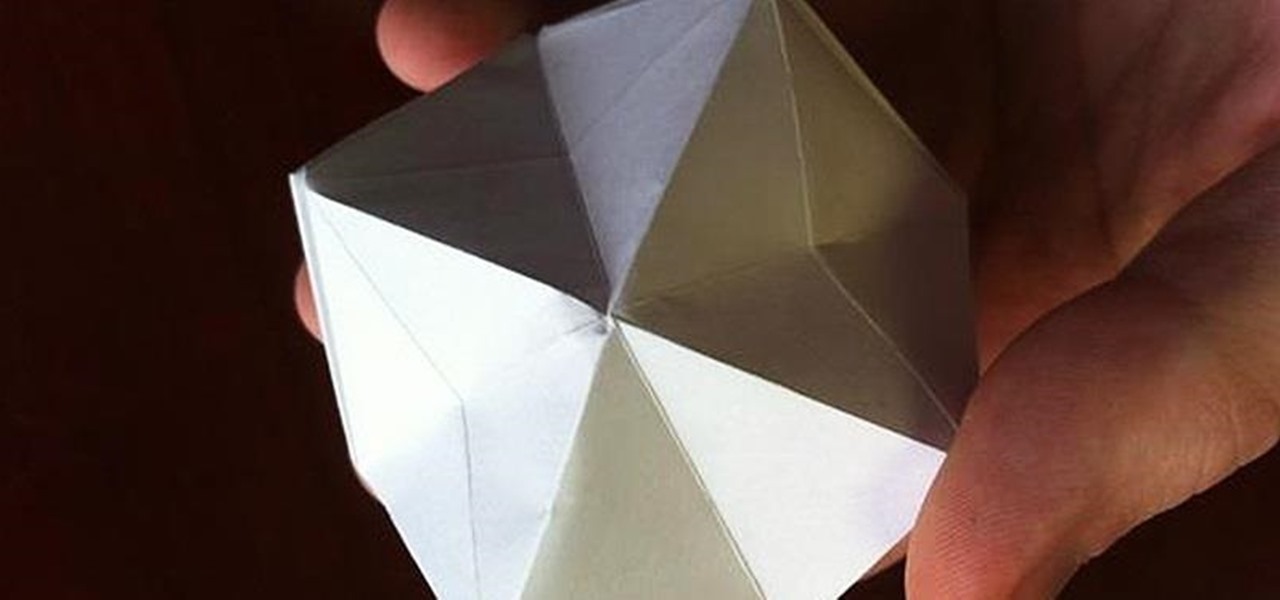

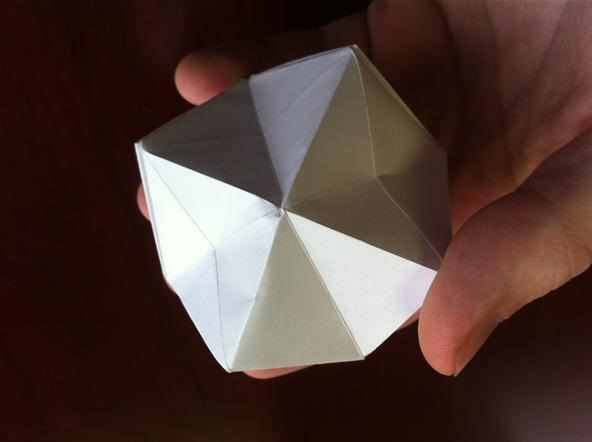
One of the most popular and basic origami geometric shapes is the "water bomb," which is a simple inflated cube. With a few extra folds and only a minor shift in approach, a more complex geometric shape can be achieved.
This 24-faced, 3-dimensional object is formed using 8 identical tetrahedron shapes, all being folded out a single square of paper.
Supplies
- Paper (A4 letter paper works well)
- Scissors
Forming a Square (If Required)
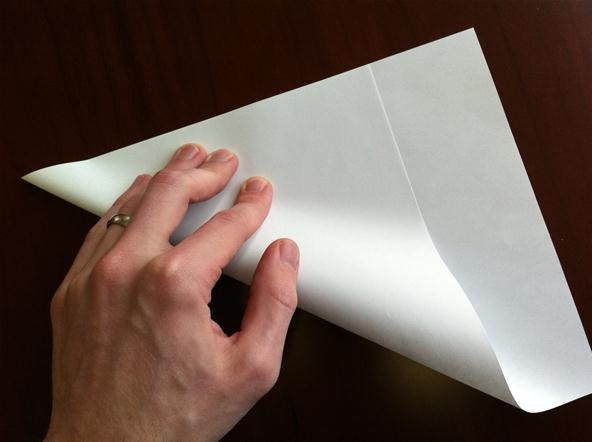
If you are using A4 (or other rectangular shaped paper), you must first form a square. This is easily achieved by aligning the short edge of the page with an adjacent long edge. Form the diagonal crease and cut off the area outside the folded triangle.
Now, let's begin with...
Pre-Folds
Sharp and accurate creases in these next steps will ensure a quality finished project.
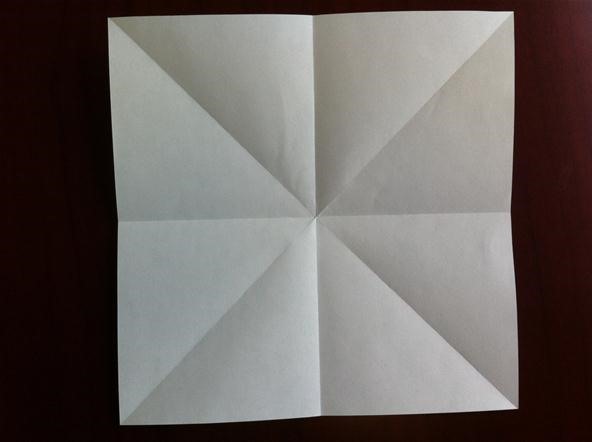
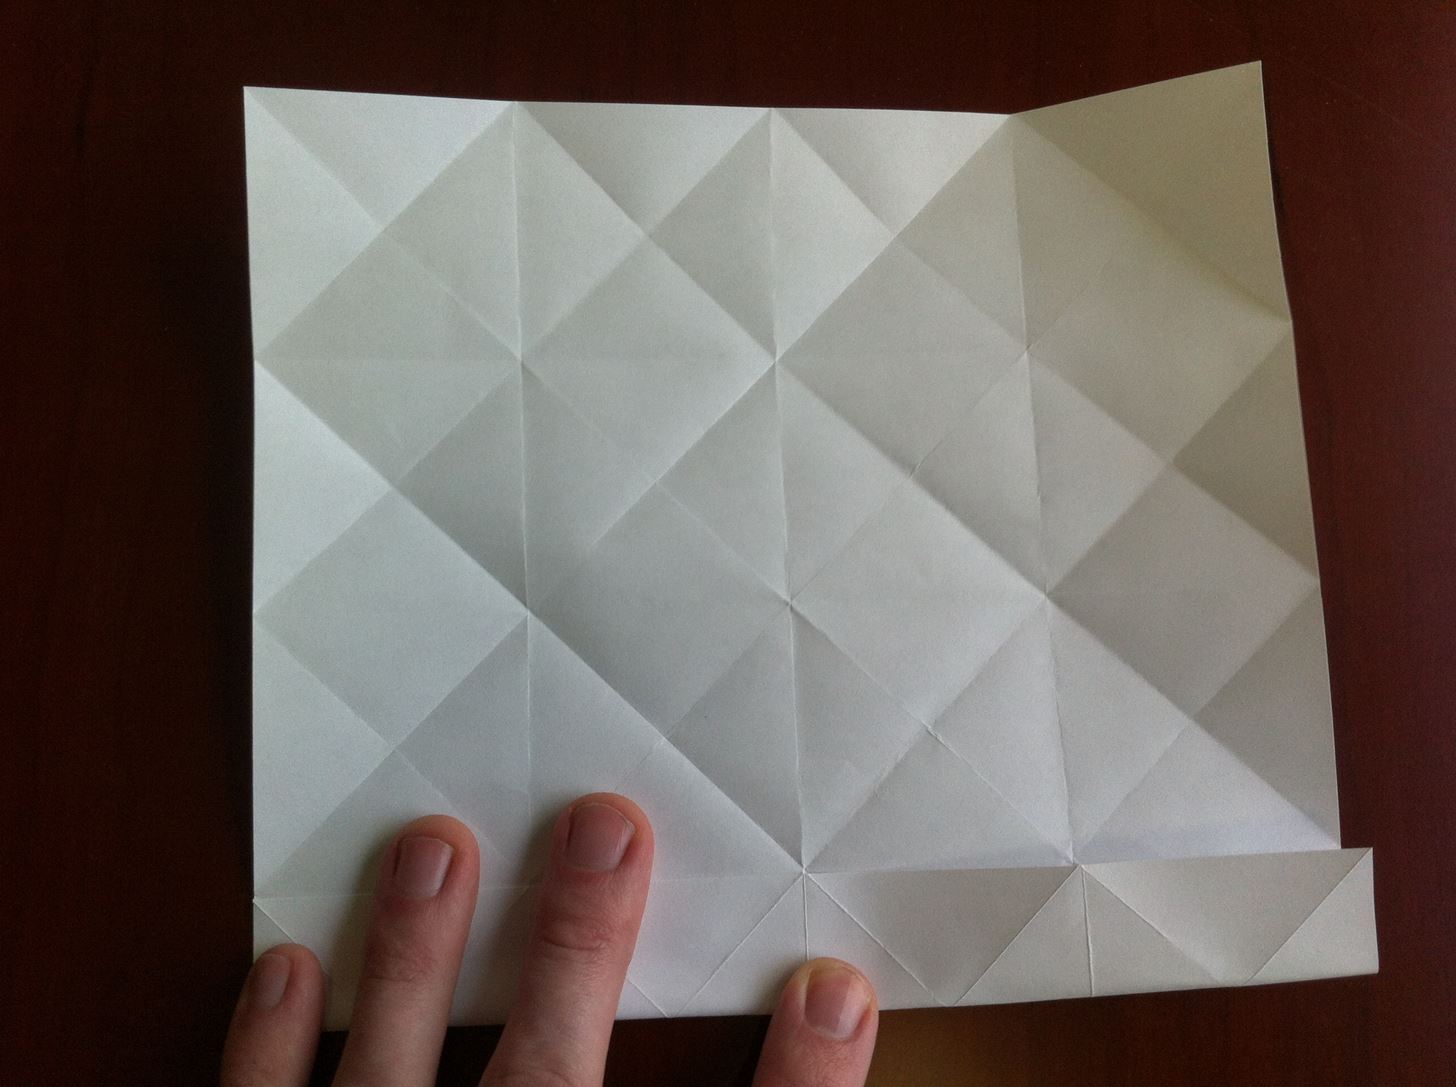
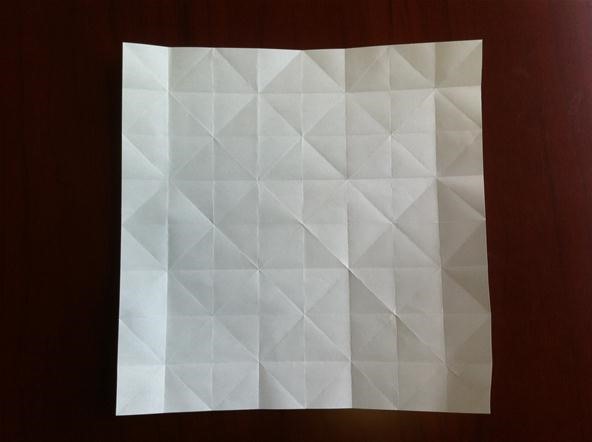
Step 1: Center Folds
We must mark the center of the square with a crease in horizontal, vertical, and both diagonal directions. With all the folds complete, your page will look like this:
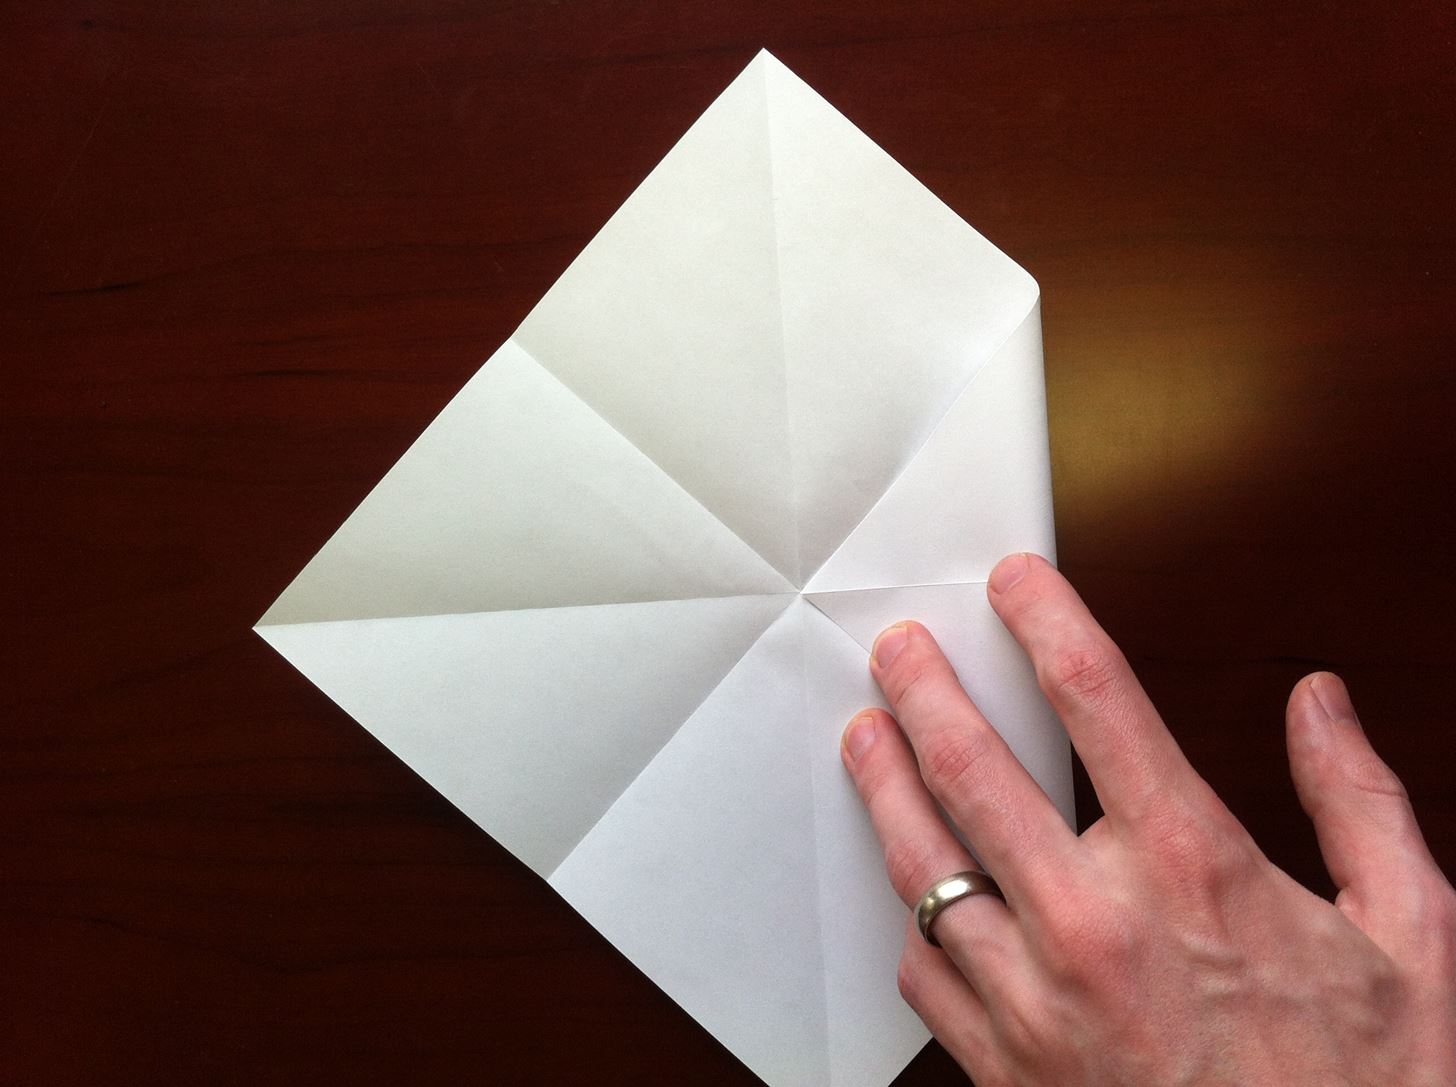
Step 2: Quarter Folds
Using the center folds from step one as guidelines, fold, crease, and unfold each edge and corner to the center. A total of 8 creases should be made in this step.
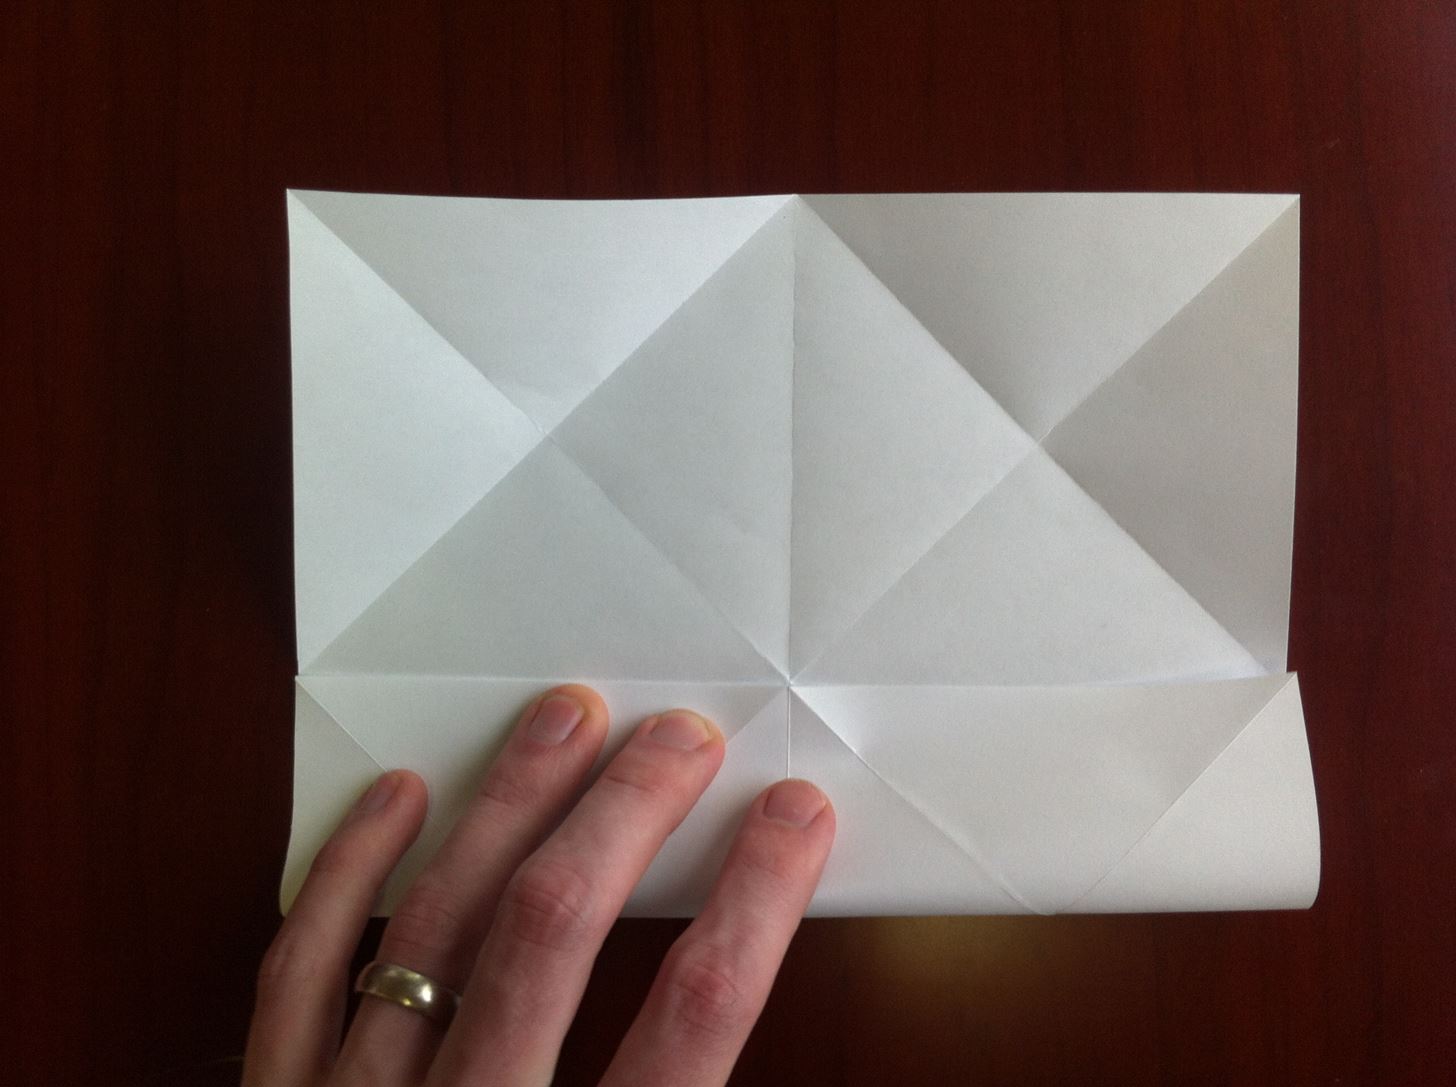
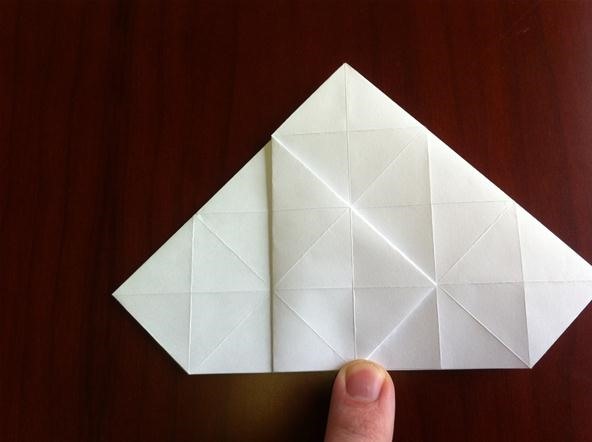
Step 3: Eighth Folds
In a similar fashion to step two, we now use the new creases to guide the next set of folds (a total of 16 this time, 2 for each edge and corner). Use the pictures as a reference for where the folds need to be made.
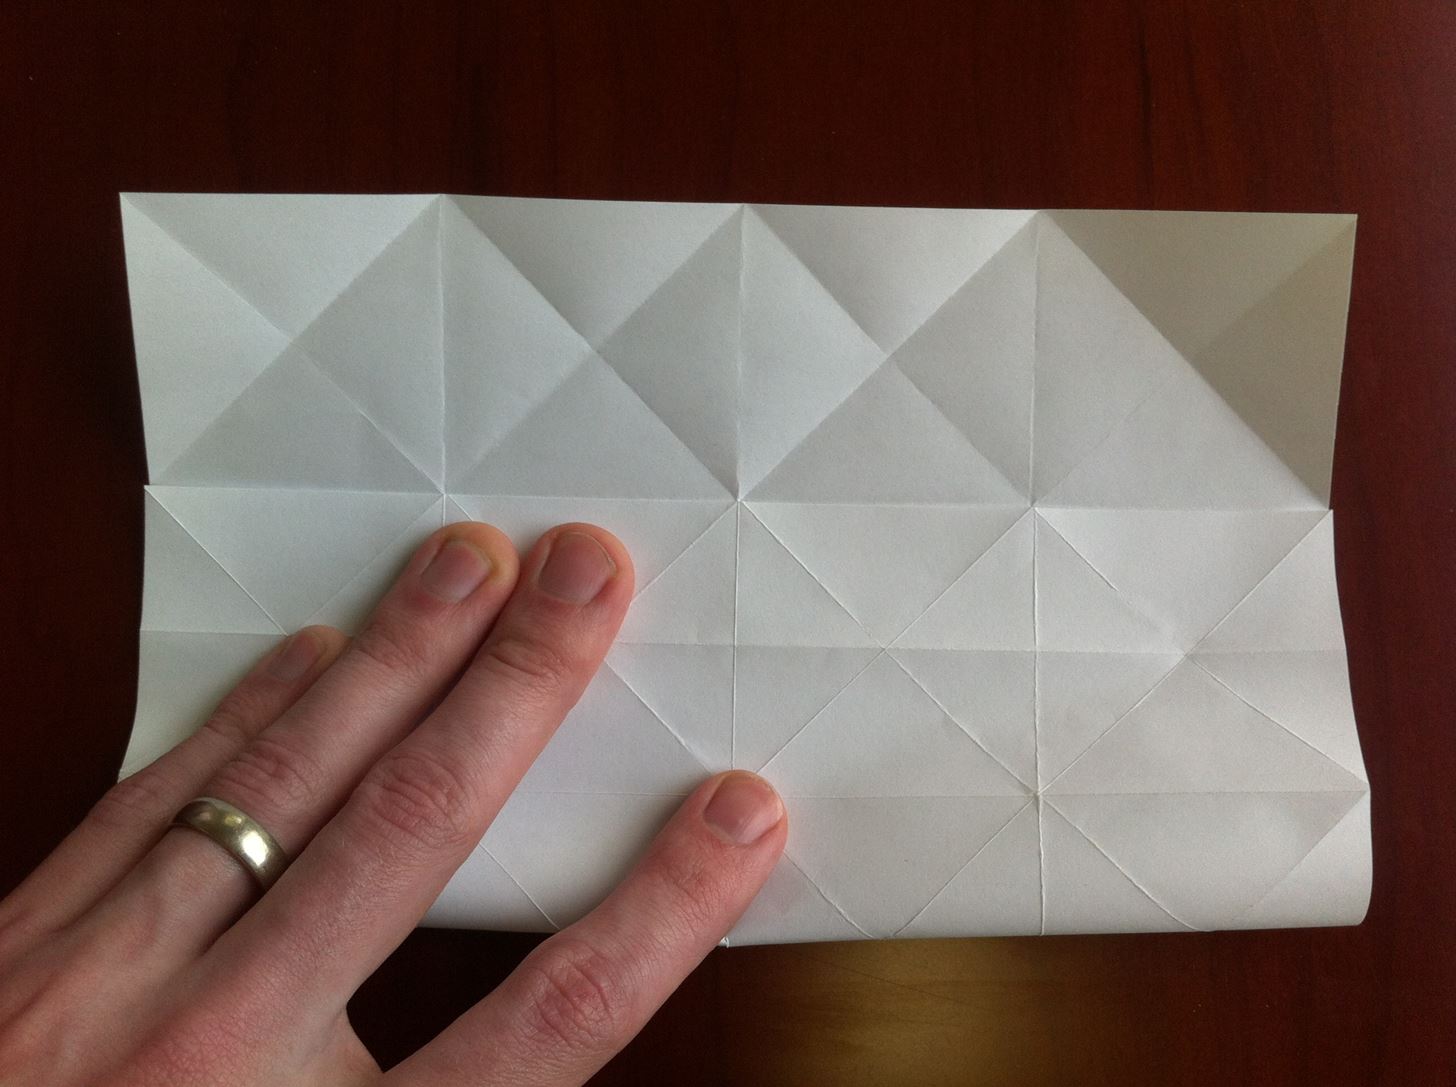
Once all 16 new folds are complete, your page will look like this:
Now we can move on to...
Assembly
These is where you'll actually begin building this textured ball.
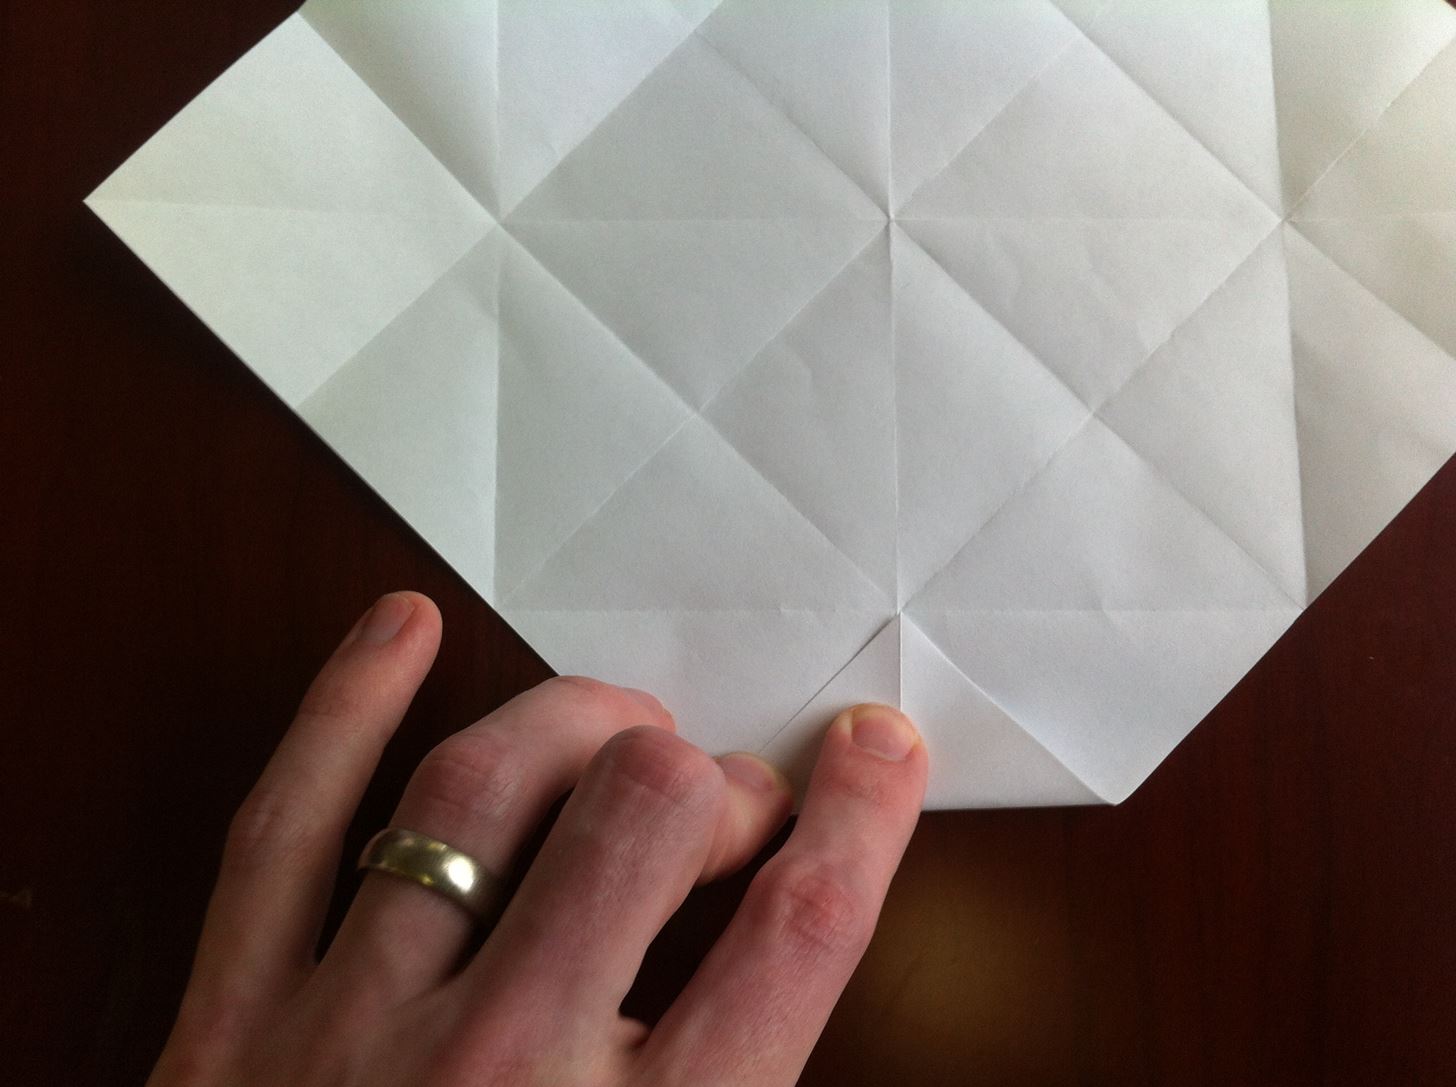
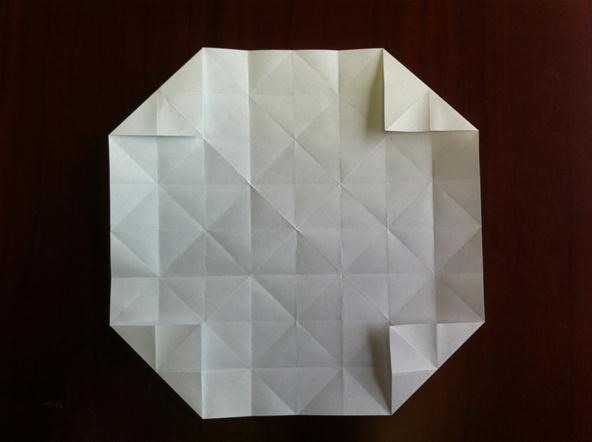
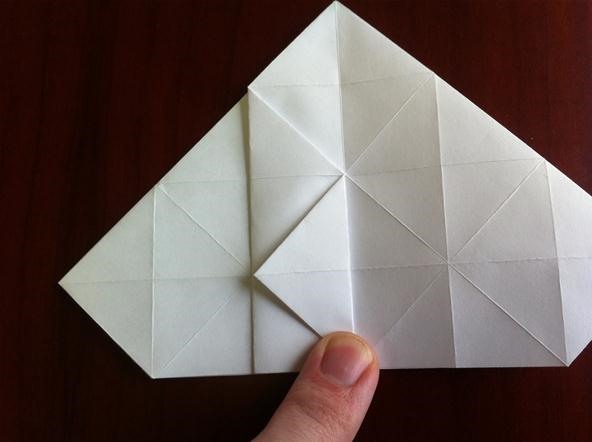
Step 4: Fold the Corners
Using the creases closest to the corners that we made in the last step, fold the corner so they point toward the center.
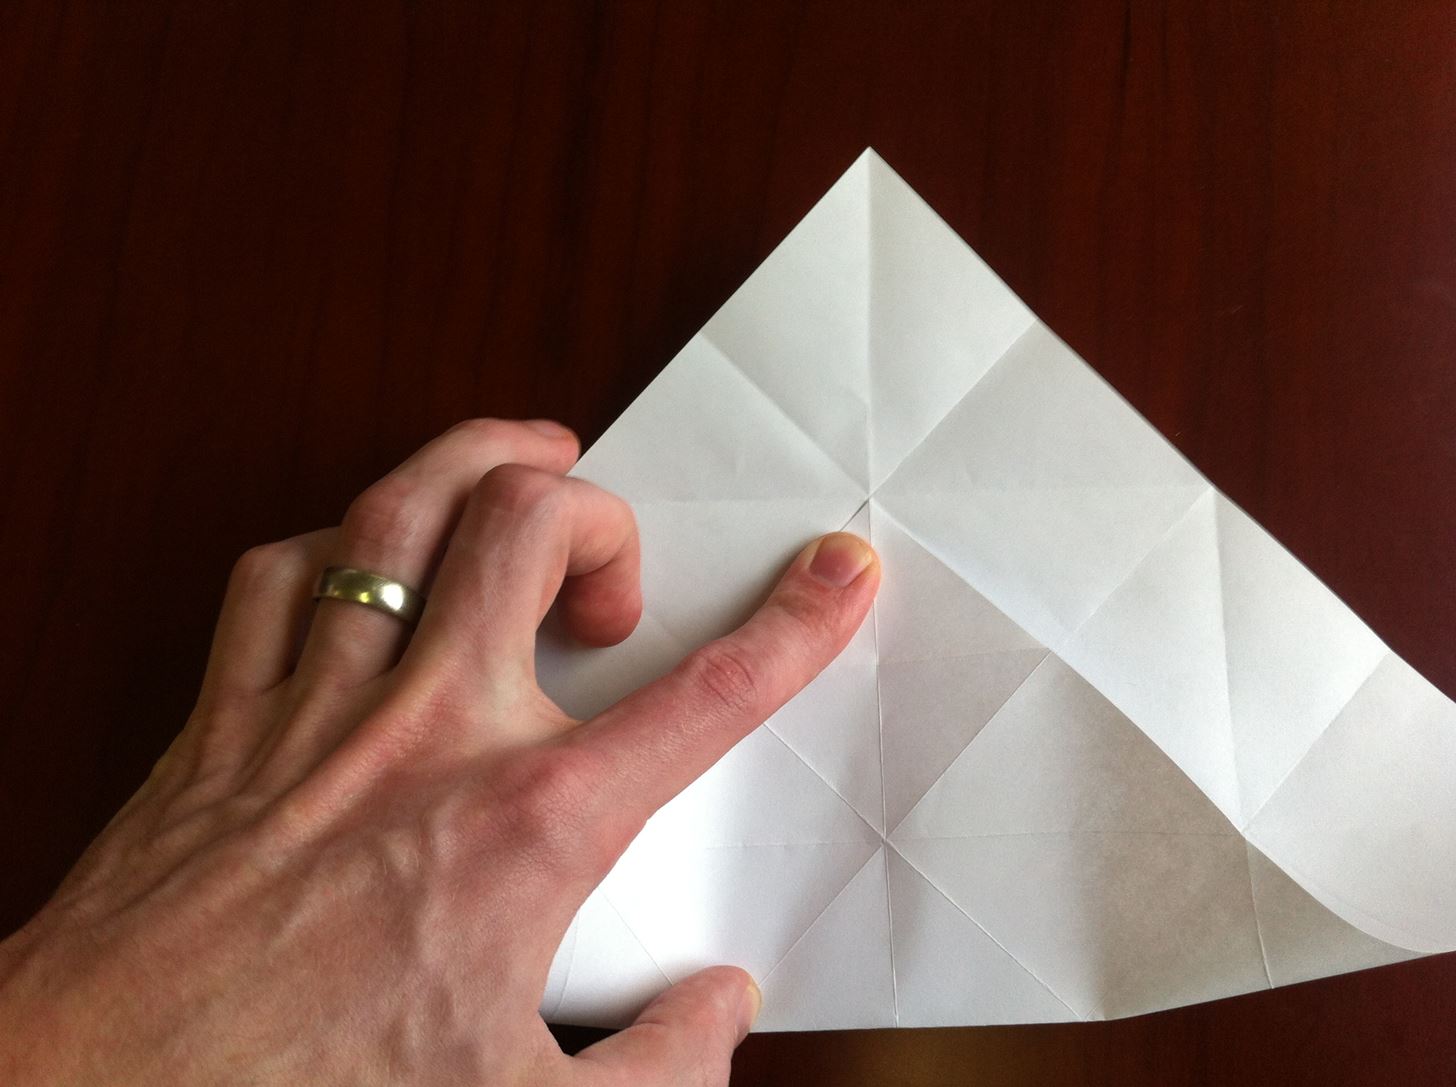
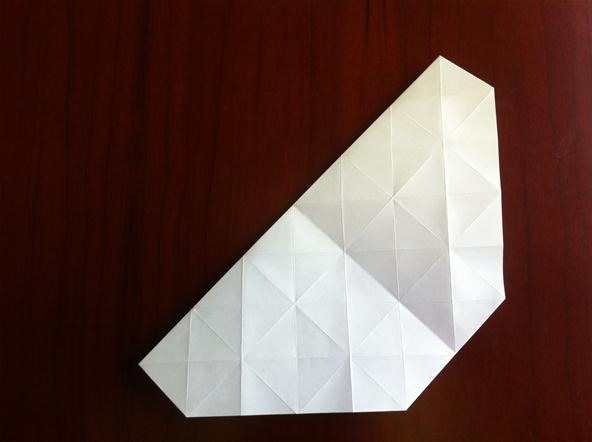
Step 5: Fold in Half Diagonally
Bring the upper left-hand corner down to meet the lower-right using the pre-formed crease as a guide.
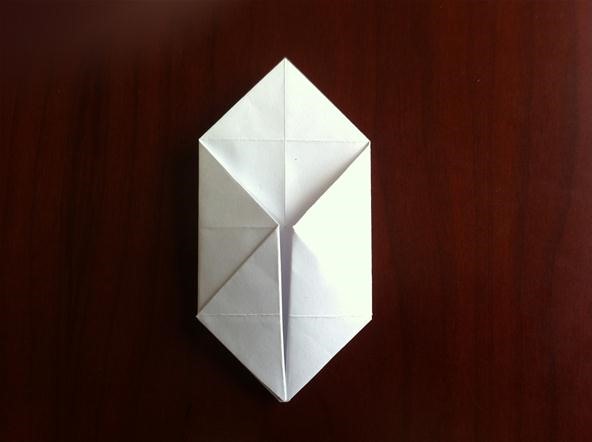
Step 6: Water-Bomb Base
If you are familiar with origami, we are now folding this into a water-bomb base that has the corners tucked in. To accomplish this, we take the top-layer lower-right corner and align it with the lower-left using the vertical center crease as a guide.
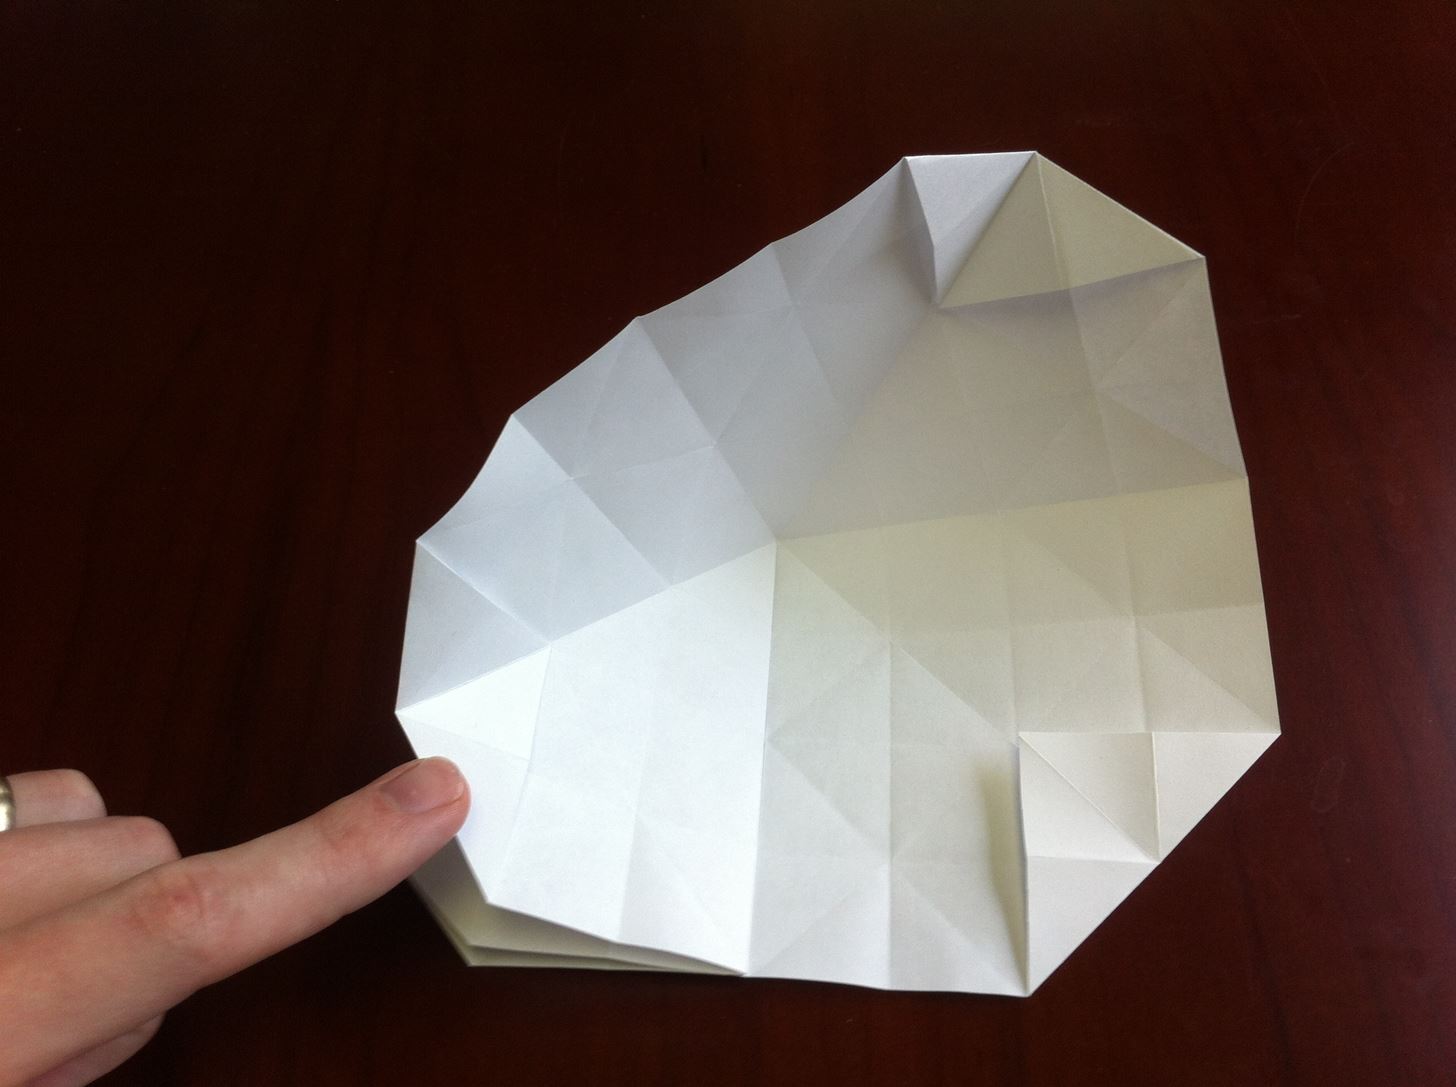

In flattening the folds, we create a new upper-right corner. This new corner will be brought down through the layers to create two flaps on the right side to match the left side.
You should now have a triangle with "clipped" bottom corners.
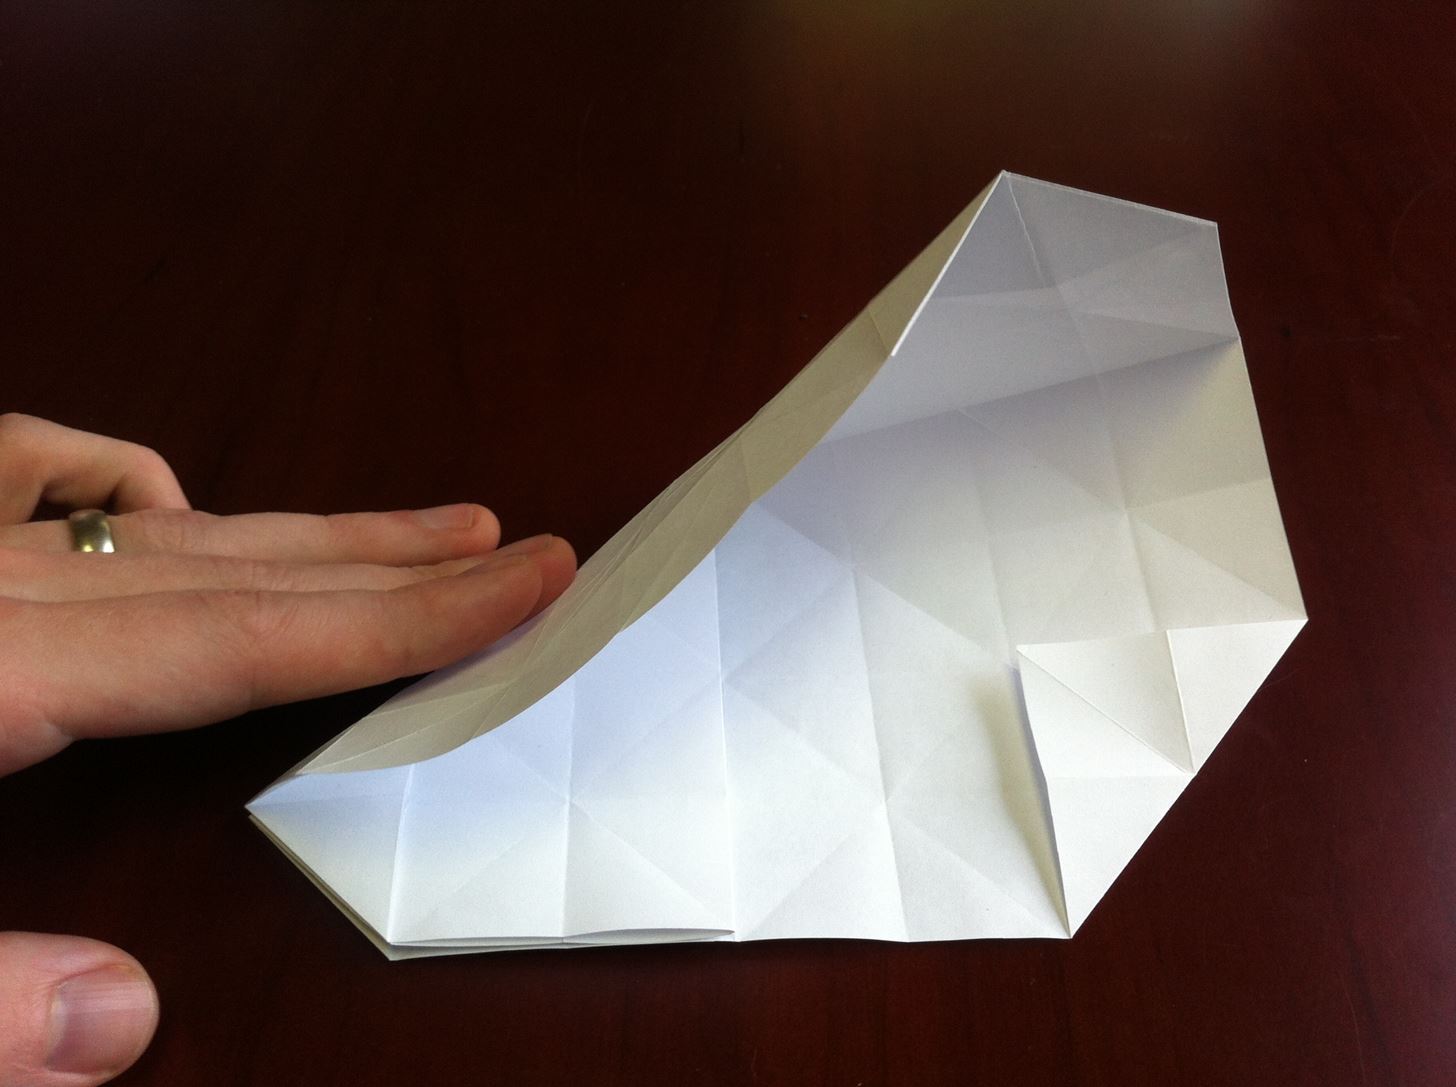
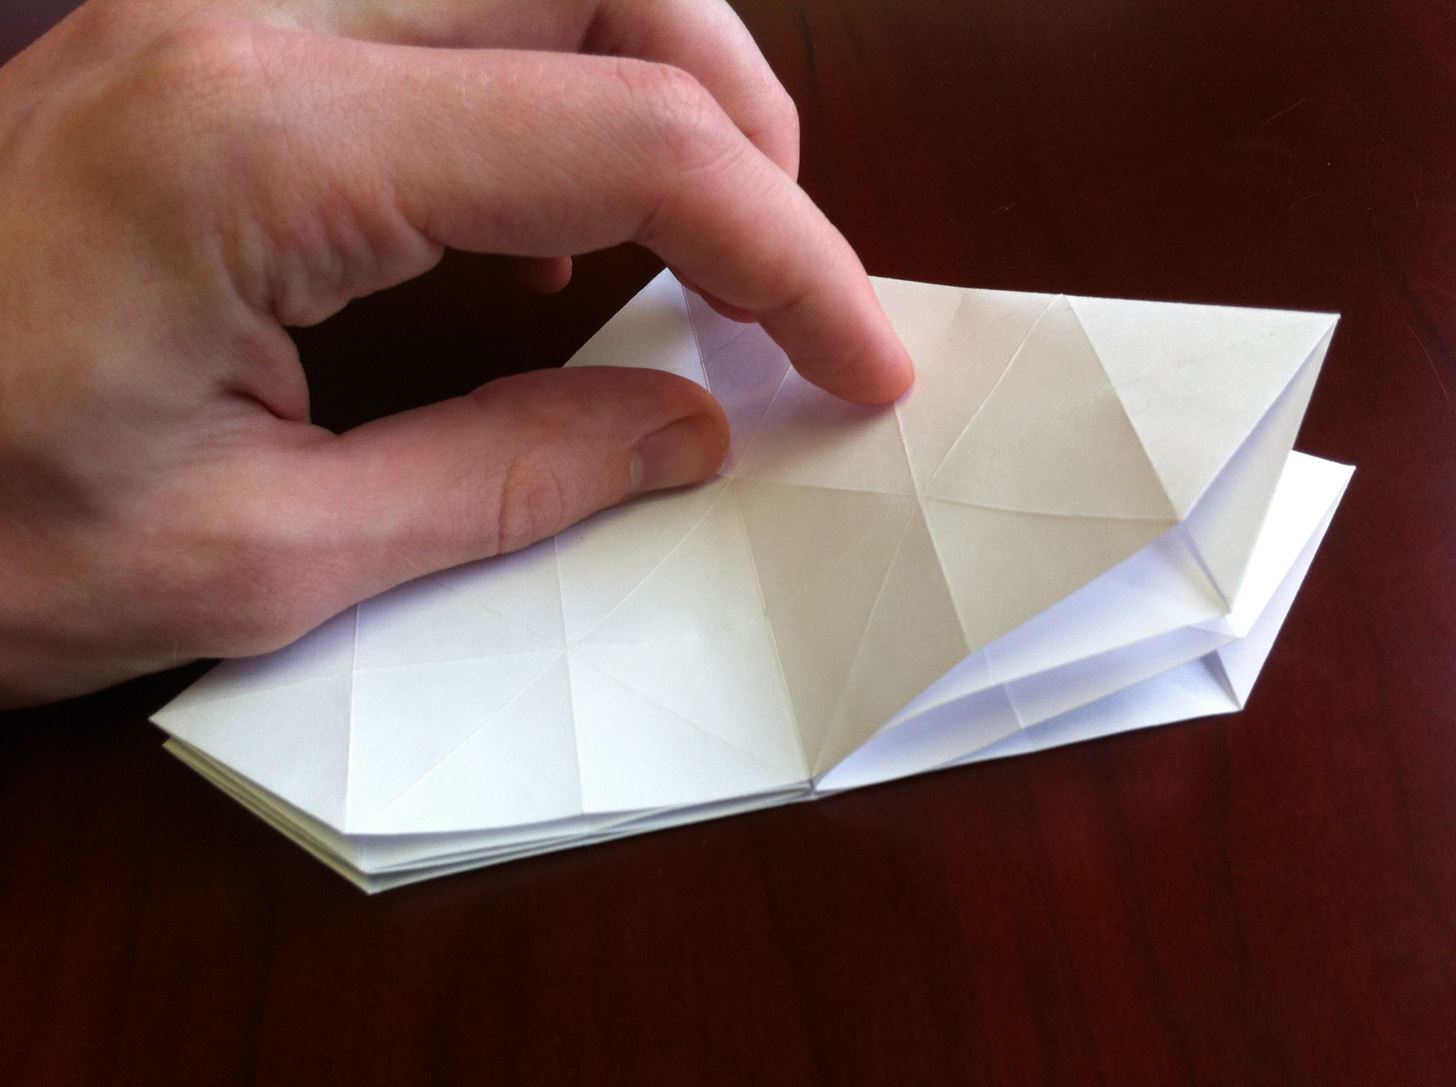
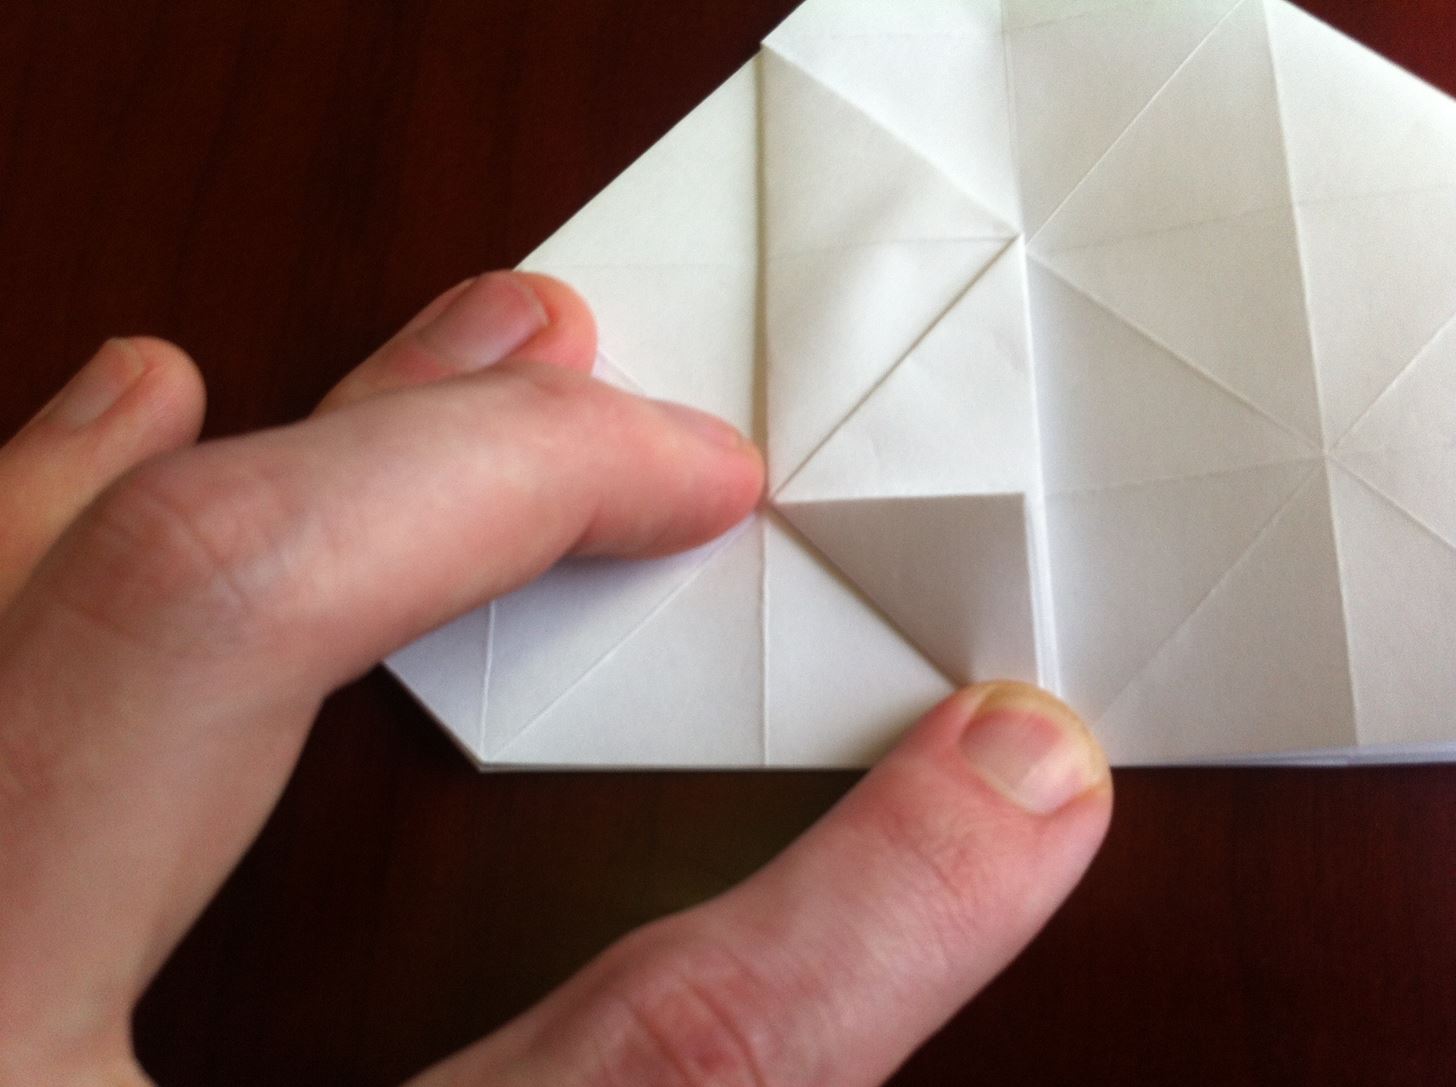
Step 7: Create a Pocket
Looking at the left side of the created shape, fold the top layer to the right using the first crease left of center as your guide.
Now fold the portion that is past the center-line back to the left, again following the crease provided.
In doing this, you will have an opening on the bottom edge of the triangle that makes up the top-most layer. We will use this in the next step.
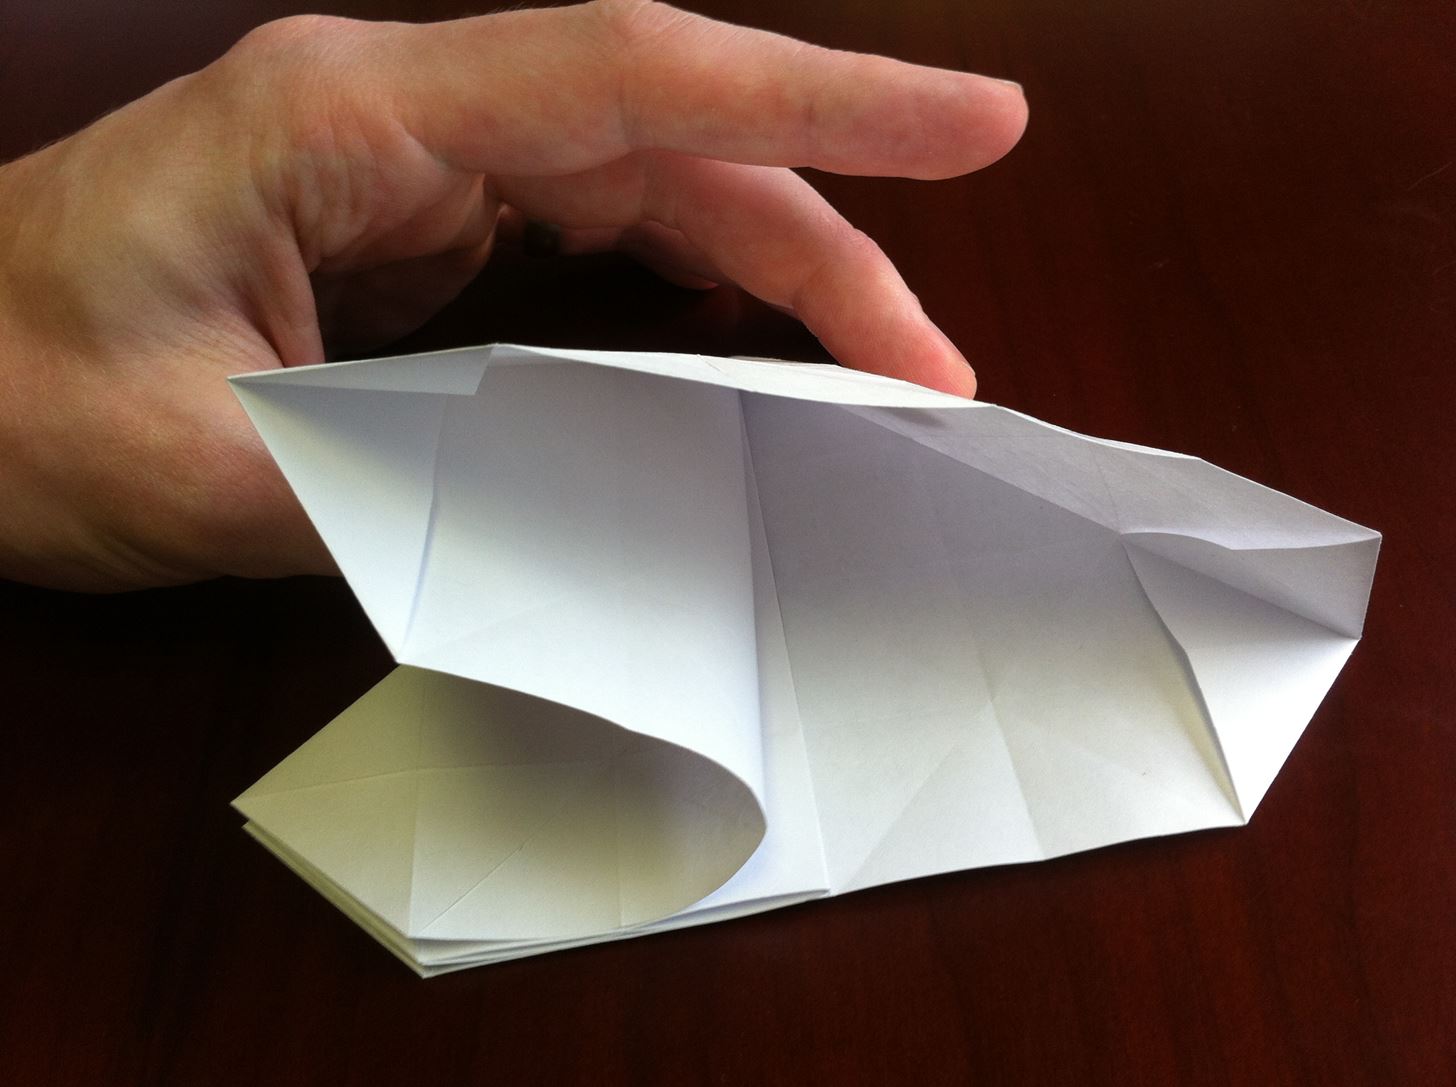
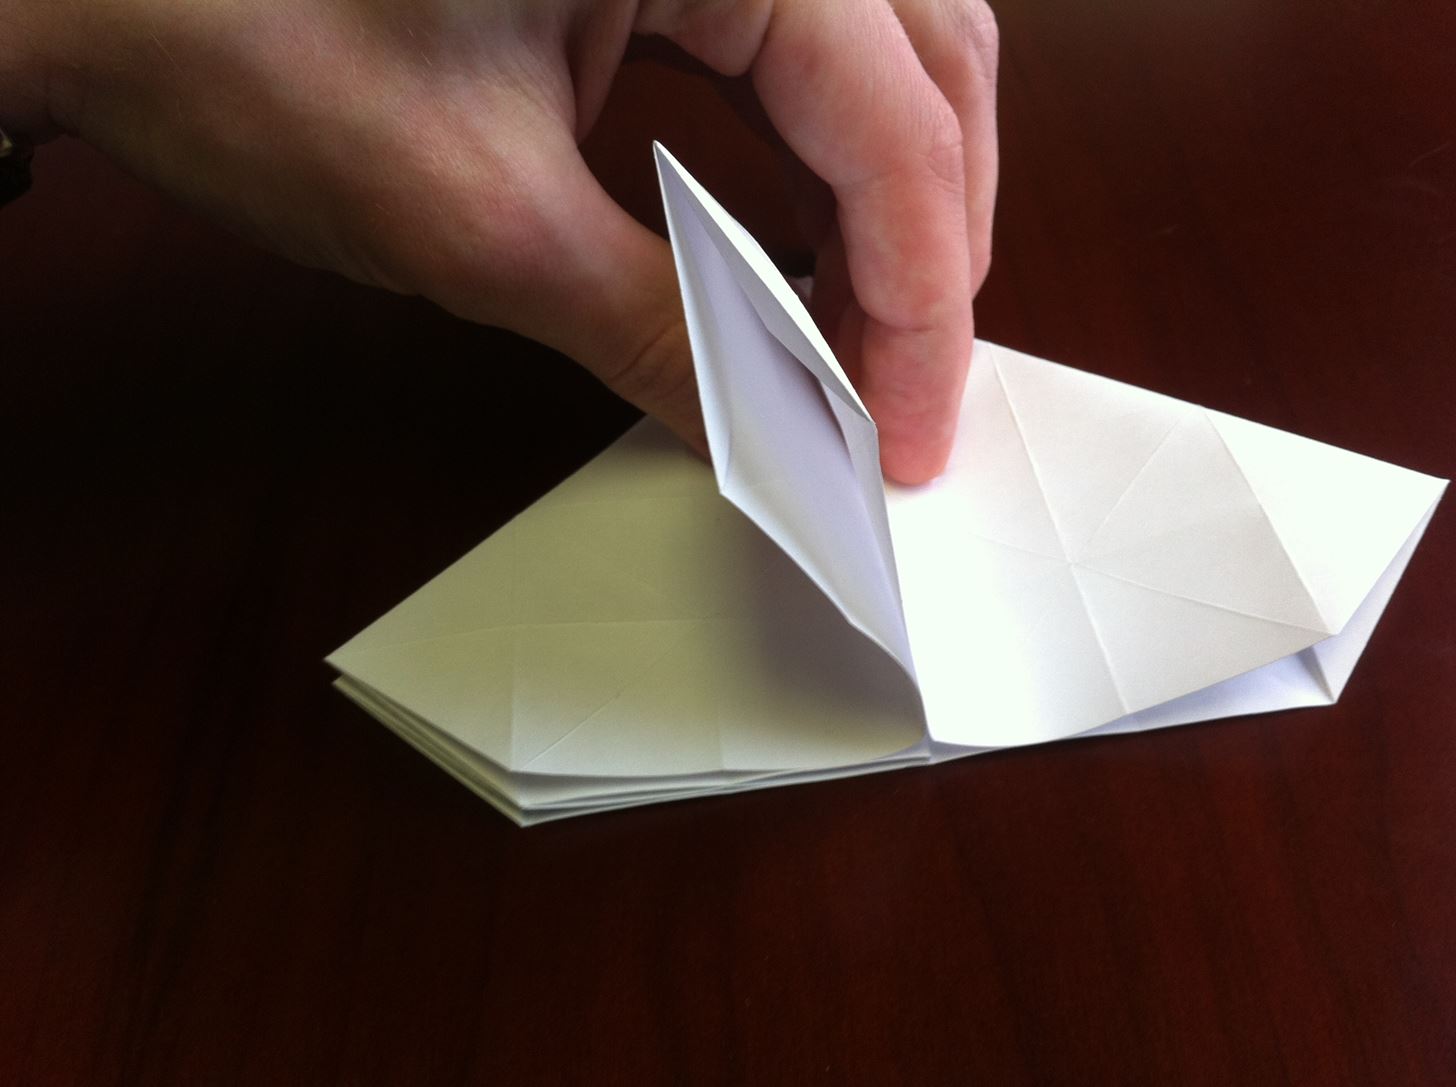
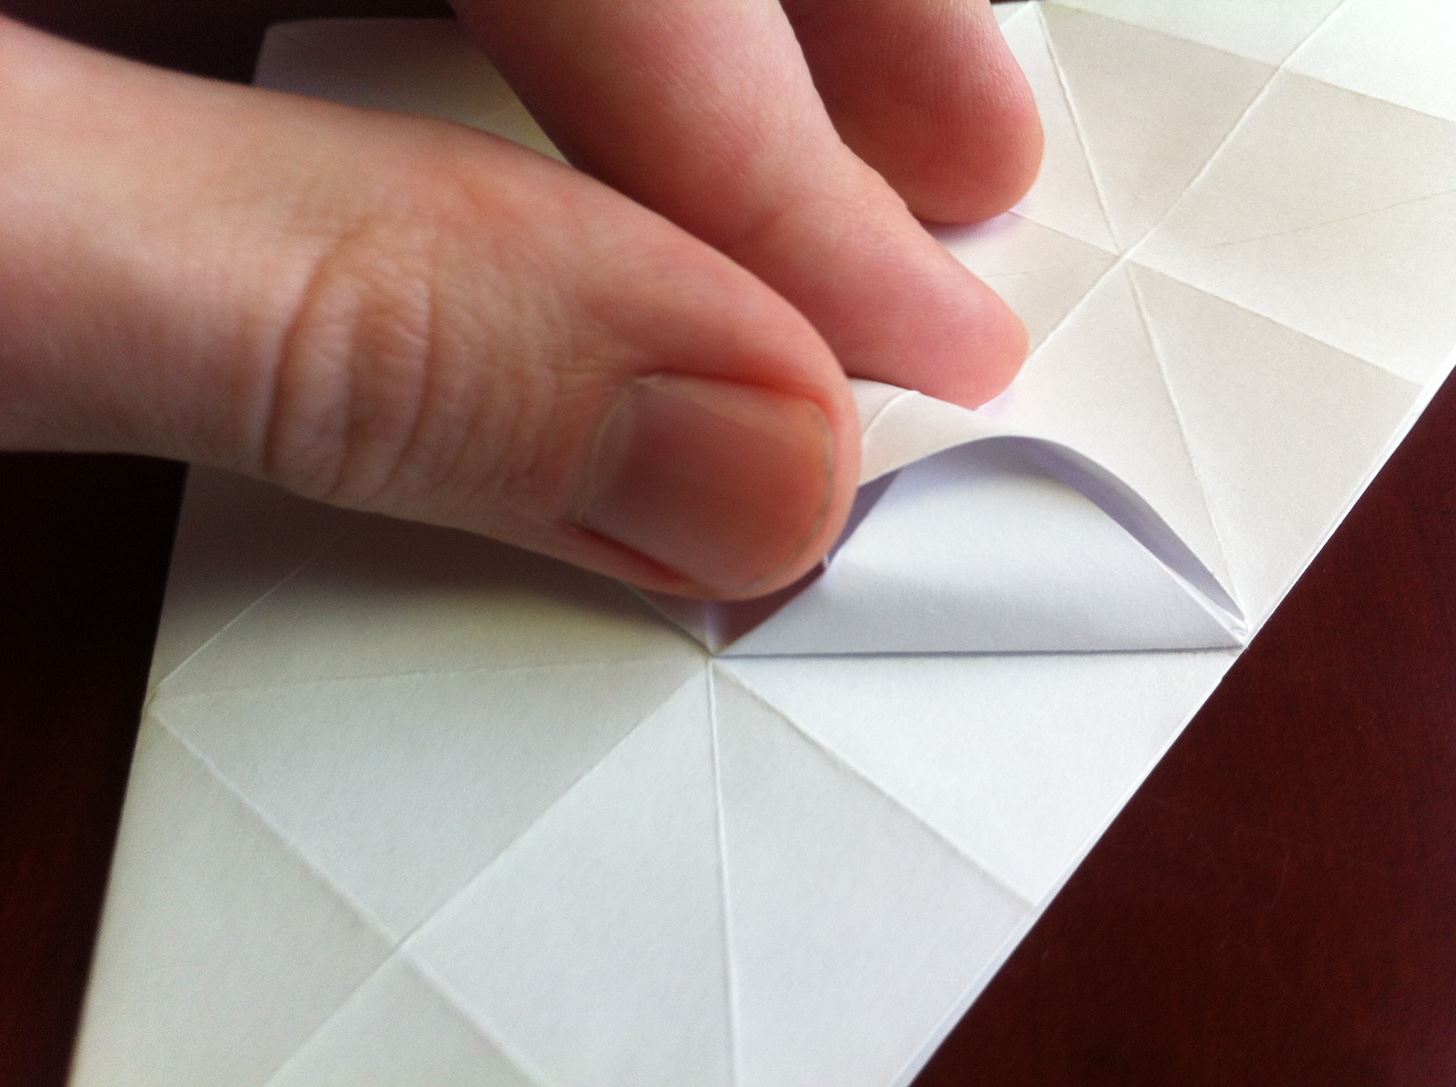
Step 8: Insert Tab
Below the triangular shaped pocket that you just created is a "tab" consisting of multiple layers of paper. Lift the tab and crease it along the edge of the pocket, then return it to it original position.
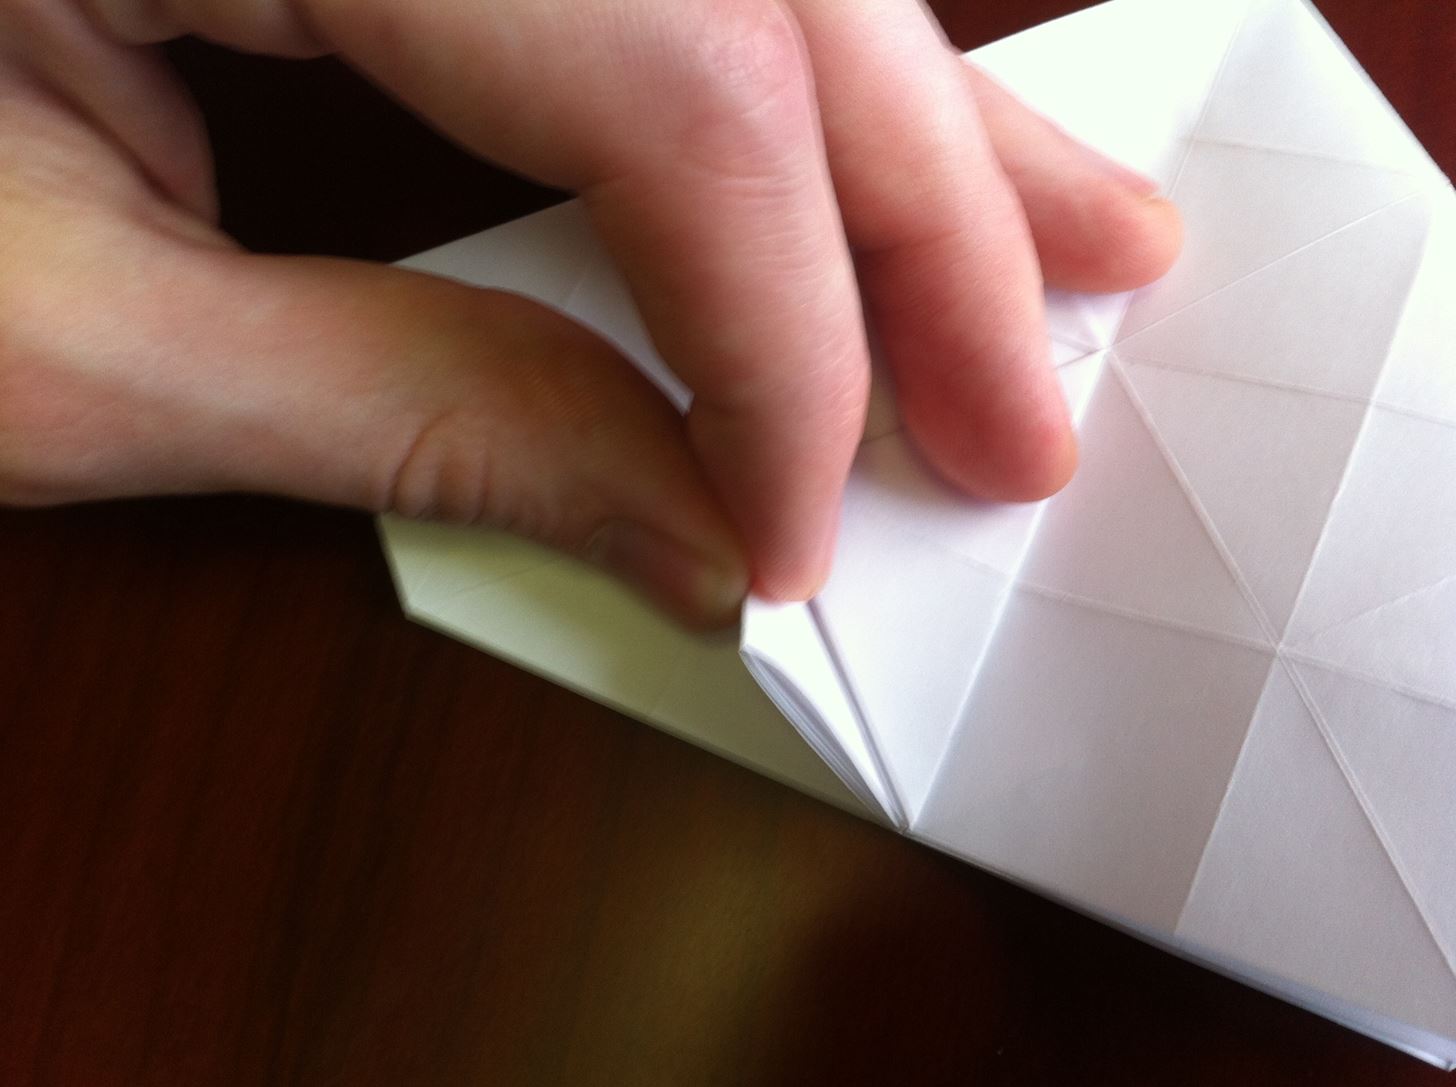
Carefully open the small pocket made in Step 7 and insert the tab inside. Gently massage the two together to achieve a flat object.

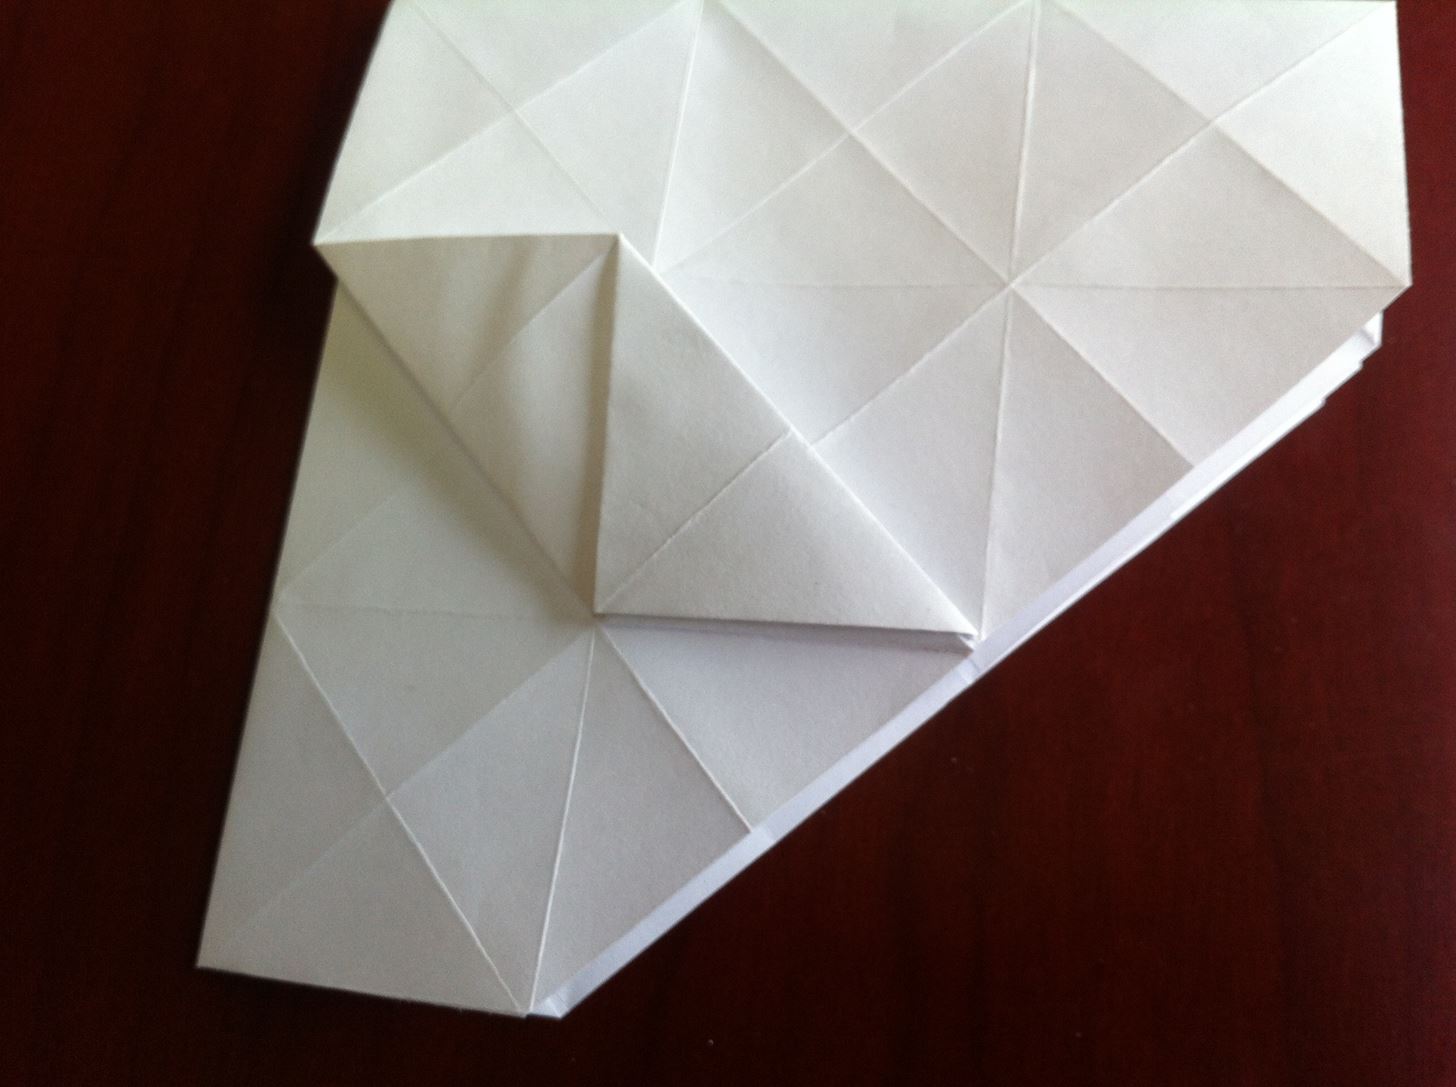
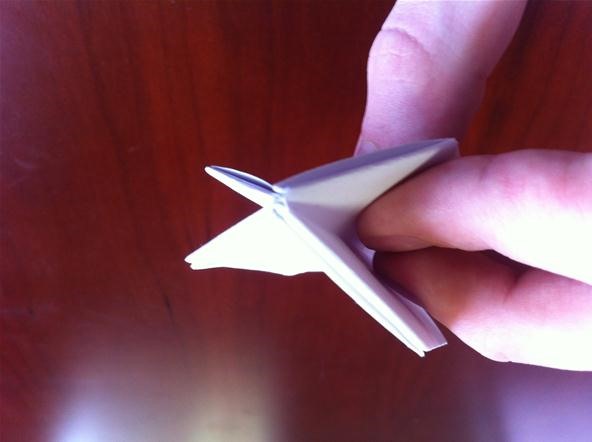
Step 9: Repeat Steps 7 and 8
Repeat the steps on the right-hand side of the object and on the backside. When complete, your folding will look like this:
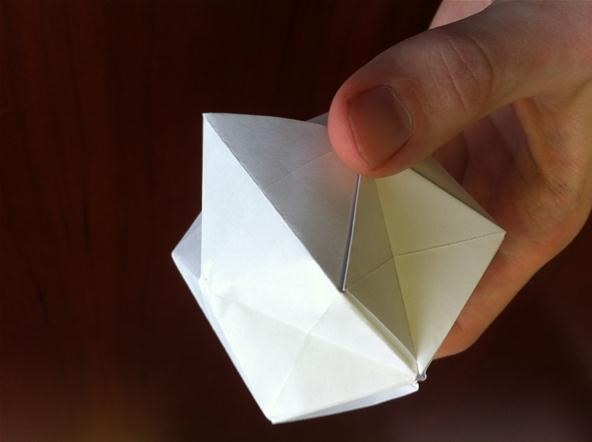
Step 10: Inflate
Pick up the object and separate the 4 individual sections to create an 'X' shape when looking at the end.
Locate the small hole and blow into it with a quick short burst of air (it my take more than one). This will bring your object into the 3D realm.
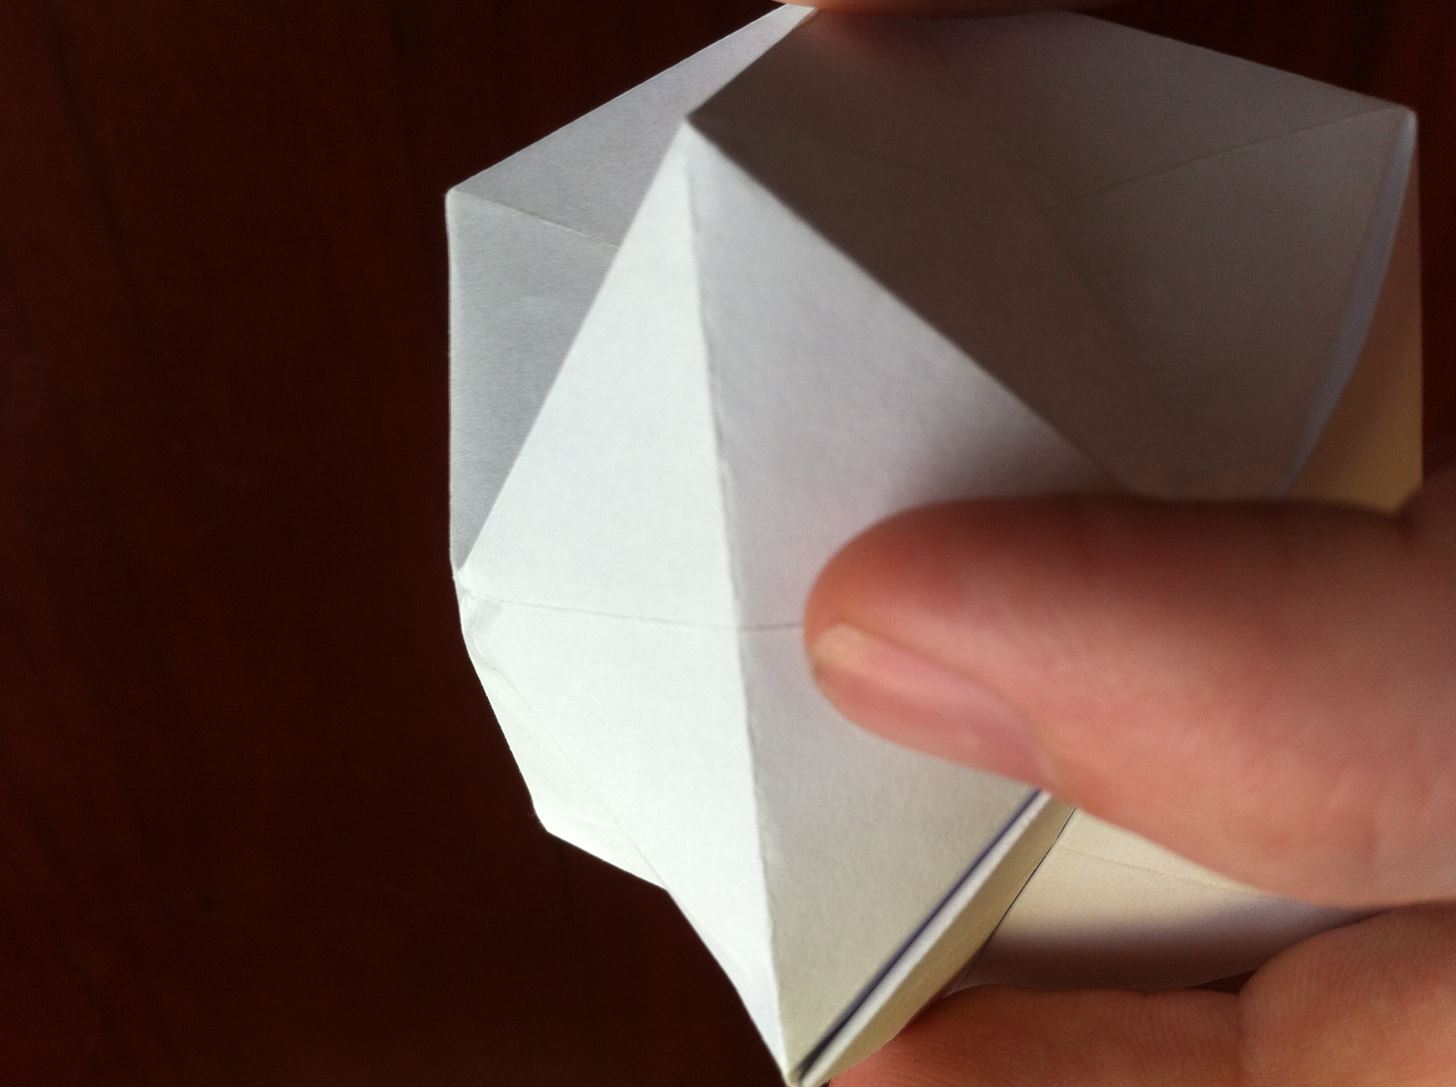
Step 11: Refine the Shape
Look for odd shaped faces. Each face on the finished product should be triangular in shape. Gently massage the inflated object, using all the pre-formed creases as guides, until all faces are correct.
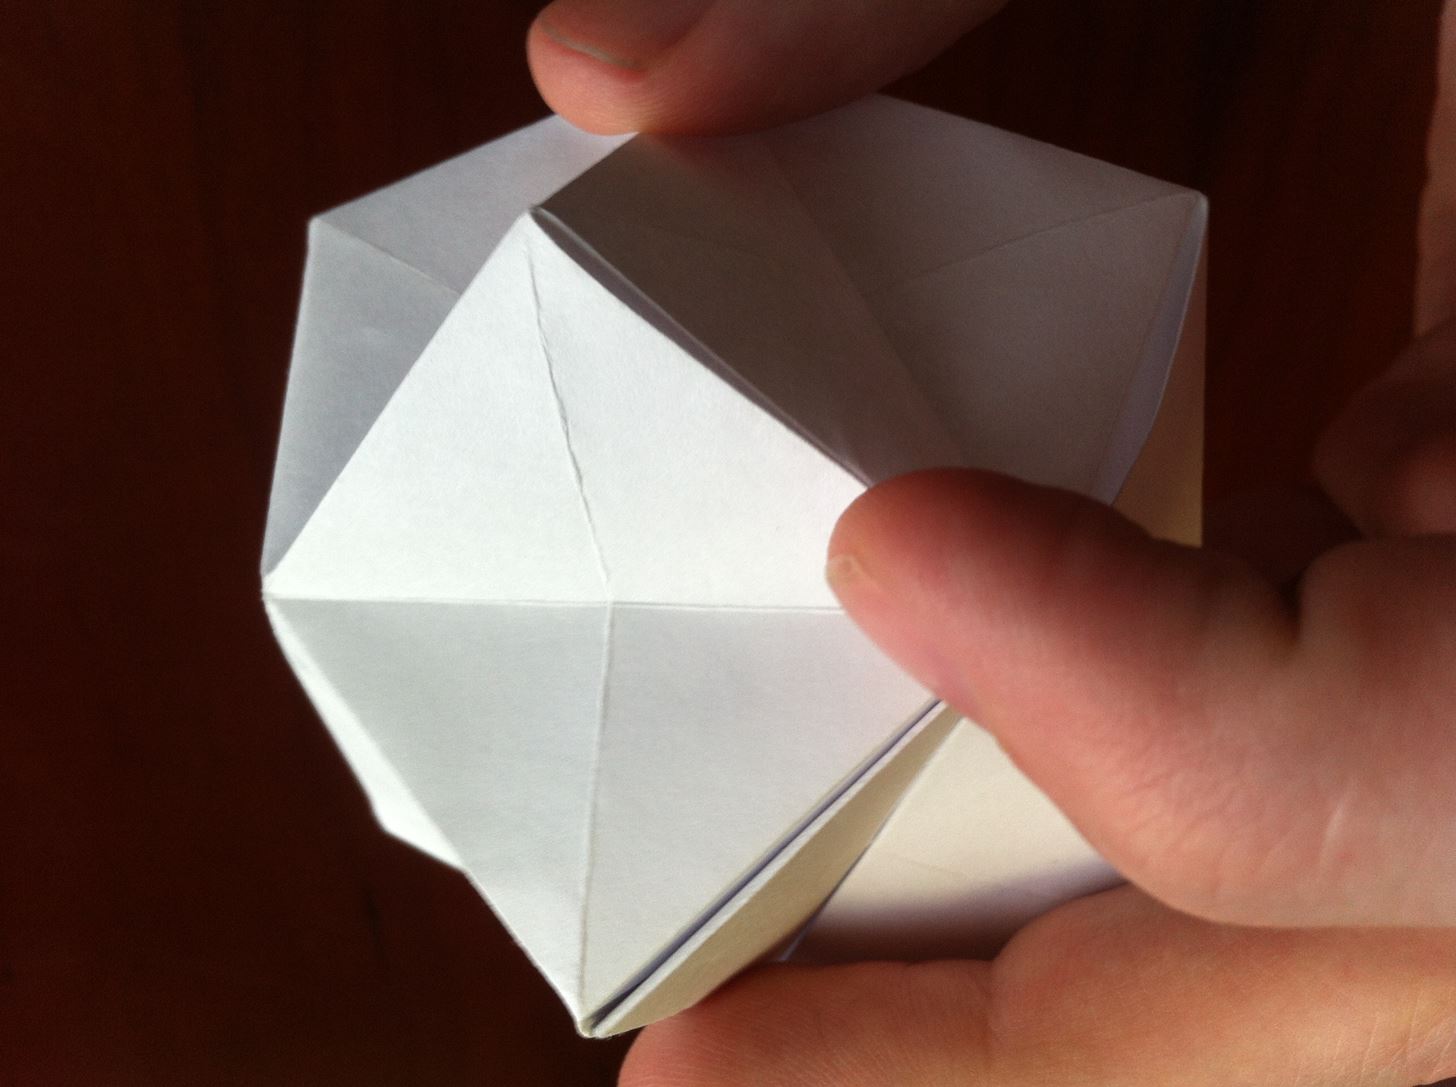
COMPLETE!
Congratulations on creating a complicated tetrahedron-based shape!
Enjoy!
Just updated your iPhone? You'll find new emoji, enhanced security, podcast transcripts, Apple Cash virtual numbers, and other useful features. There are even new additions hidden within Safari. Find out what's new and changed on your iPhone with the iOS 17.4 update.


1 Comment
simply awesome!
Share Your Thoughts